Mooring: Plaka / Leonidion

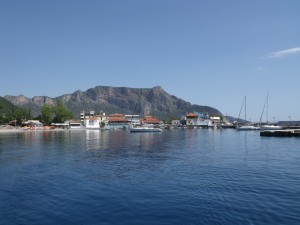
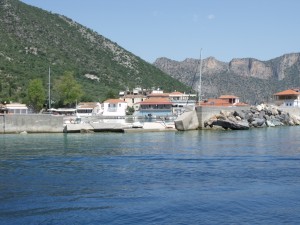
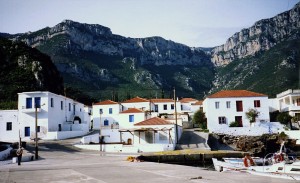
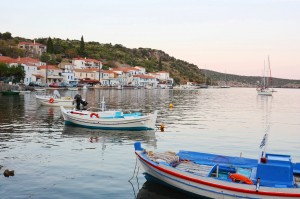
Plaka: The village seen through the harbour entrance

If you’re coming from the east, it can be hard to make out the harbour, especially as the sun lowers in the west.  Look out for the flat topped mountain and head slightly south of that and eventually you will see a telephone mast high on top the hill, or the bright blue hotel.

If coming along the coast, the harbour is at the south end of the long beach so once you’ve found that, the rest is easy.

The harbour entrance is plenty wide and boats normally berth stern or bows to. The quay is quite high so depending on the design of your boat, you may find it easier to get off if you go bows to.

At quieter times, boats sometime go side on, especially towards the inner end of the quay where there are underwater concrete blocks up against the quay.  Watch for these if going in stern to.

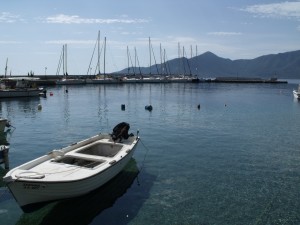
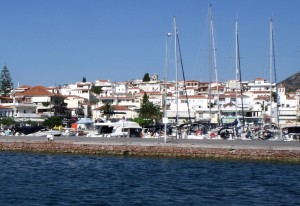
Plaka: The yacht quay with harbour entrance, right

The harbour is very deep in the centre, especially nearer the entrance, so you will need plenty of anchor.  Holding is usually good once you’ve caught hold but it does sometime take a couple of tries to get the anchor to set.

Water is available on the quay – the waterman will sometimes come and ask if you need any. There is a port police office but it’s rare to see them on the quay.

More for interest than because it has any affect on your mooring (other than reducing the available space), I thought it was worth showing a couple of pictures of the damage caused by the severe storm in February 2012, when winds allegedly reached force 11.  Don’t panic, that’s extremely unusual even for winter storms and the change of winds like that during your holiday are extremely unlikely to put it mildly.

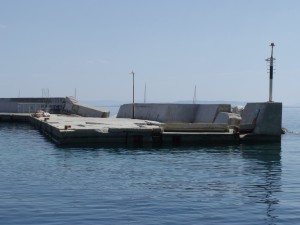
Plaka: Damage to quay following storms in 2012

Unfortunately, it took many years to acquire the EU funding to “improve” the harbour around 2004. I fear it will take many more before any cash appears to rebuild the damaged section of the quay.

Plaka: Damage to the quay from the 2012 storm

Mooring: Kiparissi

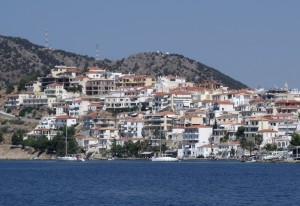
Kiparissi: The village looking down the jetty

Kiparissi: The village looking down the jetty

There are several mooring options in this large bay.  The obvious spot is on the jetty that was previously used by the ferries.  You can go side to on either side or bows or stern to off the end.

There is another pier at the north end of the bay where you can go bows or stern to, or alongside if it’s quiet.  It’s a bit of a walk in to the village from here however.

The other options are to anchor either off the beach, at the north end of the bay, or behind the headland in the south east corner.

In theory, between these options you have shelter from pretty much any direction.  That does however assume that there’s no one else in the bay competing for the above spaces!

In reality, there’s often some swell in to the bay at the best of times, and if the winds are strong and have any element of east in them, you are best avoiding the place and returning when the conditions are better.

Mooring: Ermioni

Ermioni: The quay, Limania, with yachts on the west side

Ermioni: The quay, Limania, with yachts on the west side

Ermioni is hard to miss – just follow the coast west and the tip of the peninsula will appear, often looking initially like an island.

The choice is then whether to moor on the north side or the south, a decision that often depends on the weather, though may also be influenced one way or the other by the large number of bars on the south side. If it’s blowing from the north, go to the south side and vice versa.

On the north side, the better places are stern or bows to on the east side of the main T shaped quay (the first quay you come to), or alongside the inner top side of the T (the top of the T ie the outer side, is used by the hydrofoils).

The west side of the quay is less desireable, firstly because there’s very little room to get a good length of anchor out, secondly because the holding is poor and thirdly because any wind usually funnels down the valley to the north west, which tends to push you back on to the quay. However, as this used to be the only place to moor, you’ll still find a lot of yachts head here, as you can see in the picture above.

Ermioni: Yachts leaving the quay at Mandrakia

Ermioni: Yachts leaving the quay at Mandrakia

On the south side you can you stern to the main length of quay, outside the bars.  It’s deep off the quay so you’ll need plenty of chain. Just to the east of this area, there’s a short length of quay where you can go alongside though trawlers sometimes use this. The further west you go along the main quay, the shallower the water near the quay so you may have to hang out a little.

Water is available on both north and south sides though you will have to phone the water man.  The port police may ask you for mooring fees but they’re not large and not always collected.


Mooring: Vivari / Khaidhari

The entrance to the bay is not easy to make out but you will eventually make out the ruins of a fort on the west side of the entrance. The small stub jetty is in the top north west corner of the bay but is often largely occupied by local boats.  Even if it’s quiet, there’s only room for a couple of yachts.

However, if you don’t mind a dinghy trip ashore, there is loads of space to anchor.

The bay can occasionally suffer from late afternoon winds but the holding is good and the winds die down later.

Mooring: Astros / Astrous

Coming from the north you won’t see the town until you round the headland.  It’s much easier to find from the south though confusingly from a distance it looks like an island. Closer in you will be able to make out the castle and breakwater.

The sea tends to build up as the Argolic Gulf narrows towards the north, so it is not unusual to be bounced around as you near the entrance.  It is often best to go in to the harbour before rigging fenders and warps – there’s plenty of room to float around inside.

Mooring is normally stern or bows to on the inside of the breakwater, using the seaward half. There is a kink in the quay about a third of the way along where there’s a large underwater rock against the quay.  There are a few smaller rocks at the quay edge further in too, so keep an eye out if coming in stern to.

The seaward end of the quay is sometimes used by trip boats and you may be moved on by the port police if you moor here (they sometimes mark off the area if a boat is expected). This area is best avoided anyway as the swell can work its way round the end.

Astros is prone to strong winds in the late afternoon and evening.  On occasions, I have had to re-moor yachts side to as the holding in the harbour is patchy. The winds usually die down later on but you might need to delay dinner for an hour to keep an eye on your yacht.

Mooring: Sambateki / Sabateki

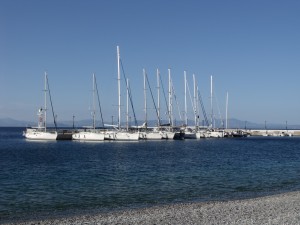
The harbour is about half way between Tiros and Plaka.  Coming from the east it will be hard to make out – head for the left edge of the flat topped mountain and you’ll be close.  Lying immediately south of a headland, it’s easier to find if you’re heading up the coast but not visible until you round the headland if you’re headed south.

The new breakwater is a substantial boulder built affair.  Moor stern or bows to on the inner side, towards the seaward end where it’s deeper – the inner end is usually full of fishing boats.

Like the new quay at Plaka, there are underwater blocks immediately in front of the quay so watch your rudder if going stern to.

Mooring: Tiros

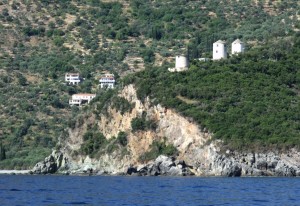
The three windmills on Ak. Tiros

Tiros: The three windmills on Ak. Tiros

The bay is easily found, lying just north of Ak. Tiros which has three windmills on the top. The quay is at the south end of the bay, just north of the headland. Coming from the north it can be hard to make out the harbour but just keep heading south down the bay and it will appear.

Moor stern or bows to on the inside of the quay. You may roll around a bit  just outside the quay but hold your nerve, it’s  plenty deep until you get very close to the beach.

This is fortunate as the space behind the quay is not large and you will need to lay your anchor well over towards the beach. There are usually some buoys for small craft just off the beach and you should aim to get your anchor just seaward of these. The holding is actually good, it’s just the quay is rather close to the shore!

Tiros: Yachts on the quay in the small harbour

Tiros: Yachts on the quay in the small harbour

At busy times, there is room to go alongside at the end of the quay though it can be a bit uncomfortable here.  The quay isn’t large and it only takes about a dozen yachts to fill it.  Once full, there isn’t really room to raft out and it’s a bit deep and exposed to anchor so allow time to try somewhere else.

Mooring: Nafplion

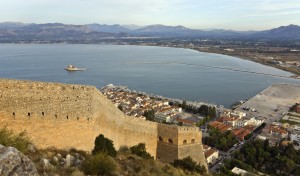
Nafplion: Wall of the Palamidi Fort with the quay and Bourtzi Fortress behind

Nafplion: Wall of the Palamidi Fort with the quay and Bourtzi Fortress behind

It’s usually a good sail up to Nafplion with the wind funnelling up the Argolic Gulf, though as the seaway narrows there can be a bit of a chop. Nafplion itself is hard to miss.  Head in to the bay observing the port mark and keeping south of Bourtzi Fortress.

Generally yachts moor stern to on the main (south) quay in front of the town, though at quieter times, yachts may lie alongside. You can also go alongside the first part of the commercial (east) quay, at the end nearest the south quay.

Occasionally, large cruise ships visit and you may be directed by the port authorities to go alongside the stubby ferry jetty.  There are large rubber protectors on the side of the quay so make sure you are well fendered to avoid black marks down your hull.

For those who prefer to anchor, or when the slop in the bay makes staying on the quay too uncomfortable, there is plenty of room to swing on the hook in the bay.

Mooring: Monemvasia

Monemvasia: View over the old harbour (left), the rock, and the "marina" (right)

Monemvasia: View over the old harbour (left), the rock, and the "marina" (right)

The rock is, unsurprisingly, not hard to spot. There are three mooring options, on the north jetty, in the “marina” south of the fisherman’s harbour, or anchored just south of the causeway.

The “marina” was going to be the solution to the lack of mooring space and did briefly extend to providing a couple of pontoons, though space was so tight that I once took a 42 footer in and on finding no spaces discovered the only way out was to reverse. Alas, the pontoons disappeared and the phase two development never reached fruition. That was a few years back when money was easy, so with the current economic trials I suspect we can abandon hope of any further development for many years to come.

What’s left of the “marina” still offers the best option and you can go stern to the quay or alongside on the inside of the breakwater.  Larger vessels may be able to go stern to the loading ramp outside the south east corner though plenty of anchor chain will be needed and it’s rather exposed, leaving you side on to any meltemi winds.

If these locations are full, head for the jetty north of the causeway and moor on the west side, side to or stern to as conditions dictate. For those that don’t like getting warps out, anchor south of the causeway though you’ll have to push in as it gets deep fairly quickly.